How to integrate the CMP into a Shopify Shop?
About the deprecation of Checkout Extensibility on Shopify: You probably are already aware about the Checkout Extensibility scripts on Shopify being deprecated. As a result, the consent banner will no longer appear during the checkout process. However, if you implement Shopify's consent mode as outlined in our help documents, Shopify will manage consent for you seamlessly. Rest assured, following our guidelines will ensure everything works smoothly. For detailed instructions, please keep reading on.
Please note: The below description is only valid for the manual blocking code. If you want to use automatic code blocking, please ensure that the CMP-Code is inserted directly after the <head> element of your website code.
Shopify Customer Privacy API
In order to safely trigger certain plugins within Shopify, the Shopify Customer Privacy API must be called. The CMP will do this automatically, if you carefully follow the below outlined integration steps.
Integration video
Integration Step-by-step
In order to integrate the CMP-Code into a Shopify Shop please follow these steps:
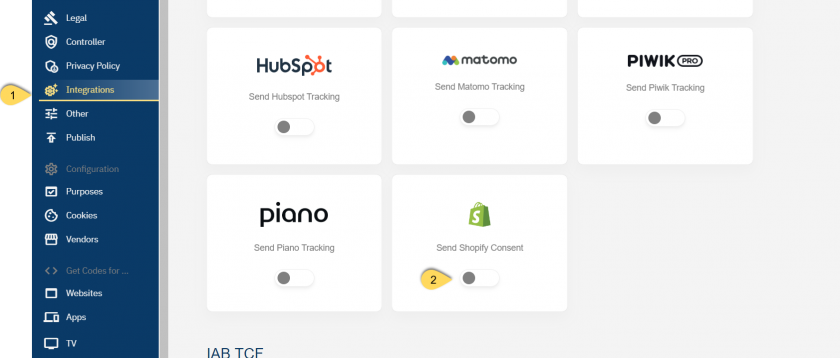
- In your consentmanager account, go to Menu > CMPs > Integrations and enable Shopify Consent Mode
- Ensure under Menu > CMPs > Purposes that you have sufficient purposes active in your CMP
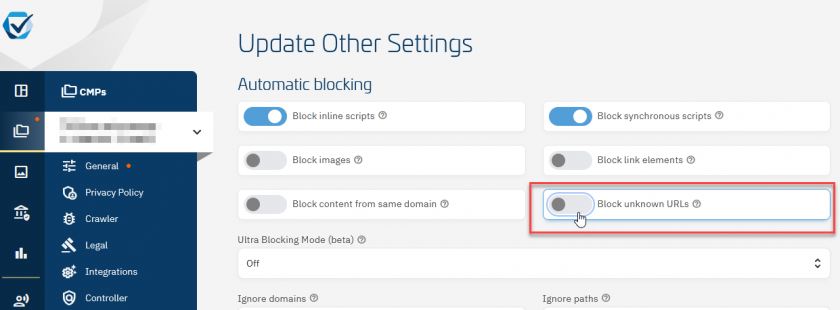
- (optional) If autoblocking is used, we recommend disabling the automatic blocking of unknown URLs:
- Go to Menu > CMPs > Vendors and ensure that you have the vendors named "Shopify International Limited ..." (IDs s971, s2789, s2790, s2791, s2697) in your vendorlist
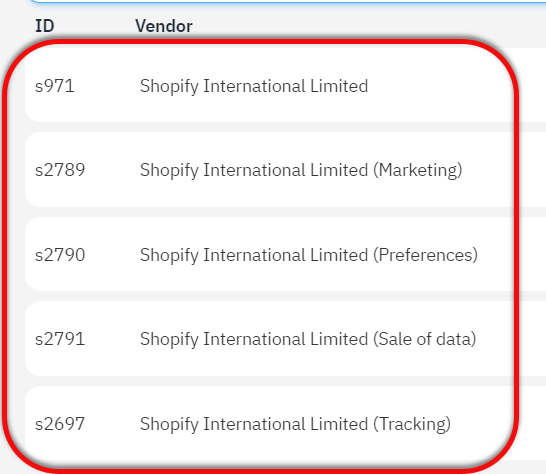
(Note: Not all of these vendors are necessary in all cases) - In your vendorlist, ensure that all Shopify vendors are assigned to a corresponding purpose
- Go to Menu > CMPs > Get Codes for ... Website and copy the CMP-Code
- Login to your Shopify account
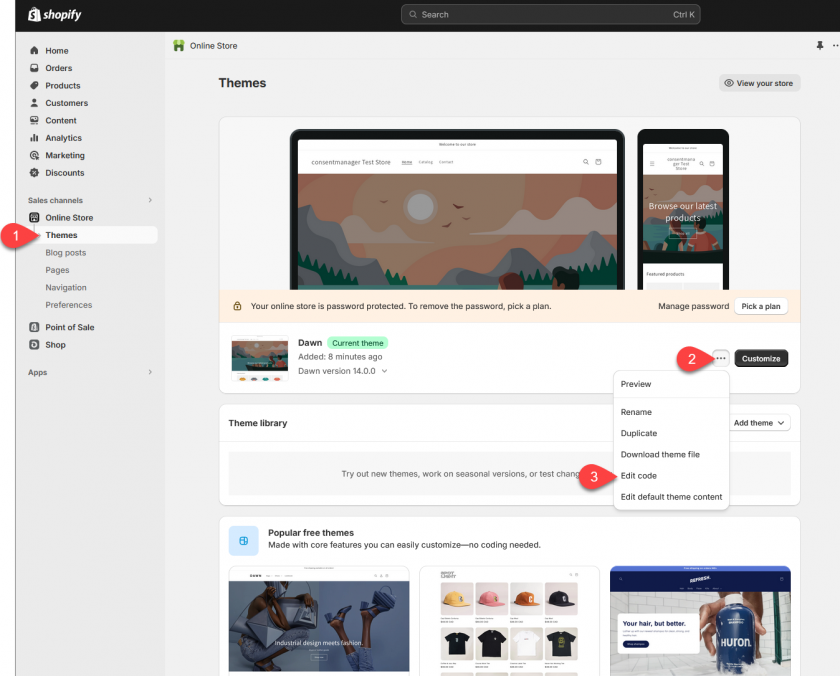
- In the menu click on your Online Store > Themes and edit the code of the current theme:
- Open the file theme.liquid, search for
<body ...>(if you want to use the manual blocking code) or<head ...>(if you want to use the automatic blocking code) and insert the CMP-code right after it: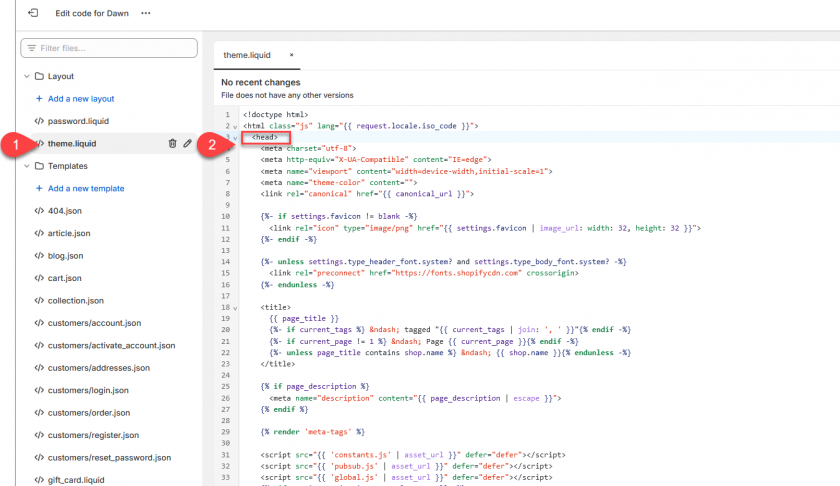
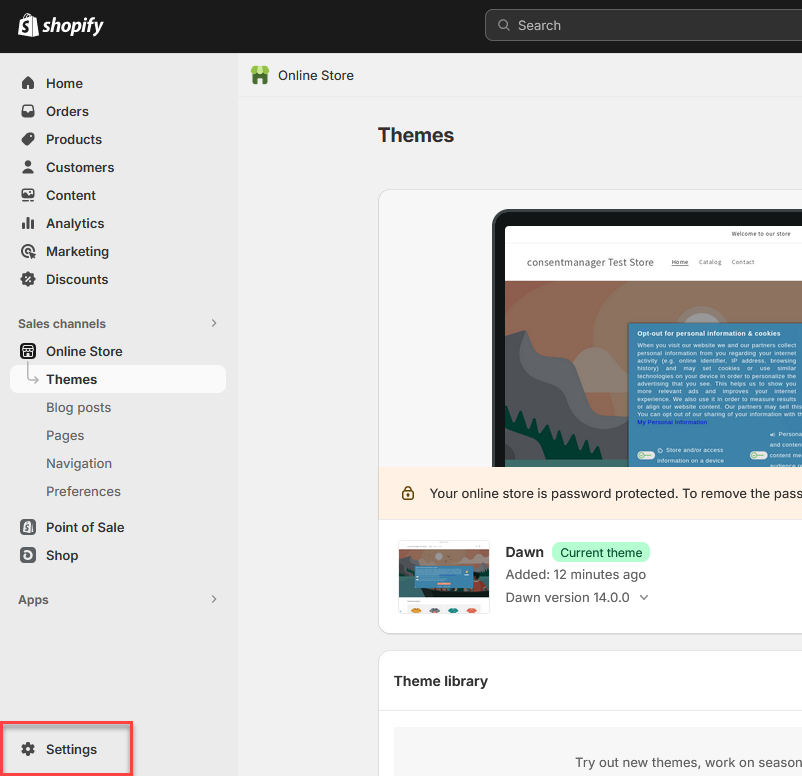
- Press Save and go back to the store homepage
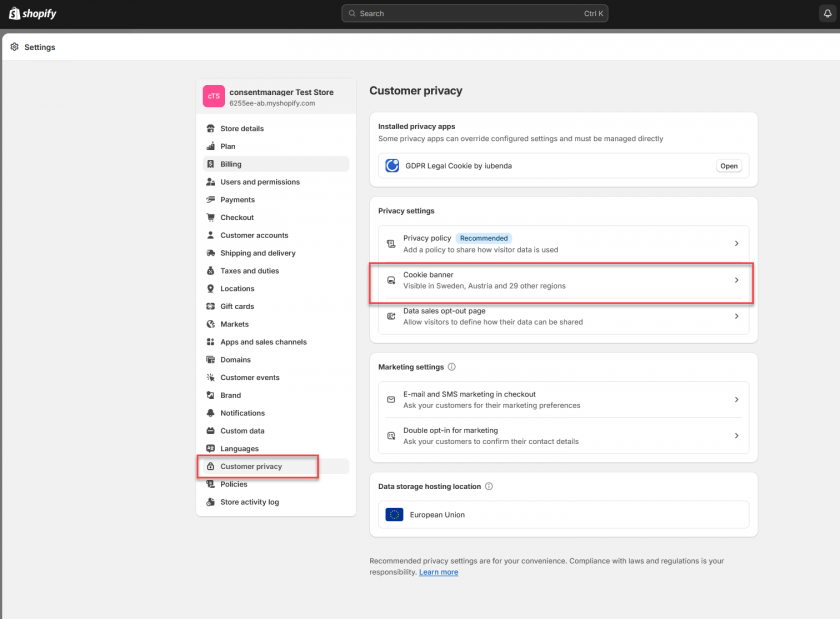
- Click on Settings > Customer privacy and Deactivate the cookie banner (if the Shopify Cookie Banner is enabled, otherwise skip this step)
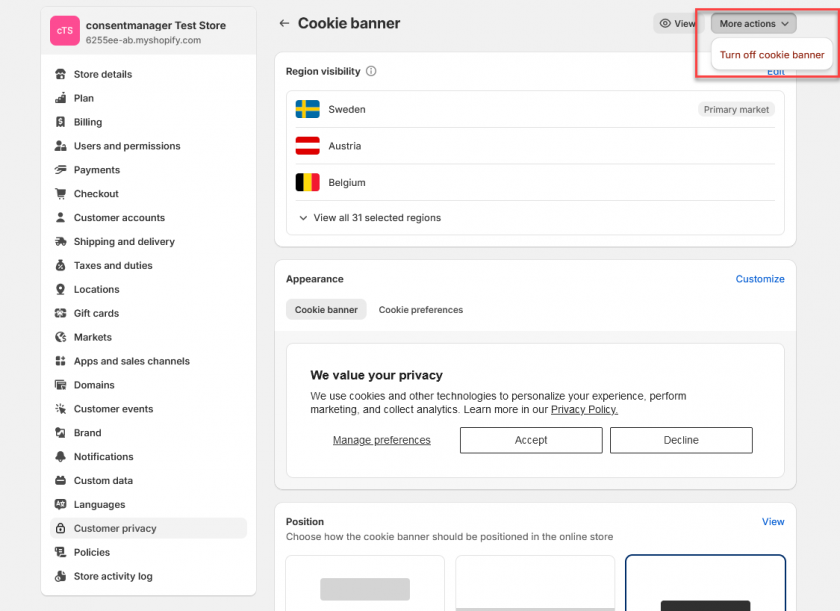
Note: If Shopify does not show you the Menu Cookie banner > More actions > Turn off cookie banner, please ensure to first delete all other cookie banner plugins via Settings > Apps and sales channels > ... > Uninstall). In some cases it also helps to enable Shopify's own Cookie banner and then disable it again.
Note: In some versions of Shopify the setting says "Remove cookie banner" instead of "Turn off cookie banner":
- Go back to Settings > Customer privacy and click on Cookie Banner and then on More actions > Use custom cookie banner
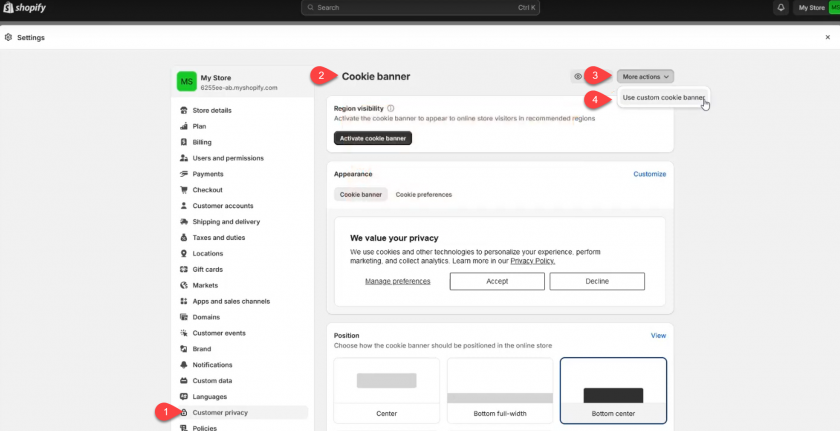
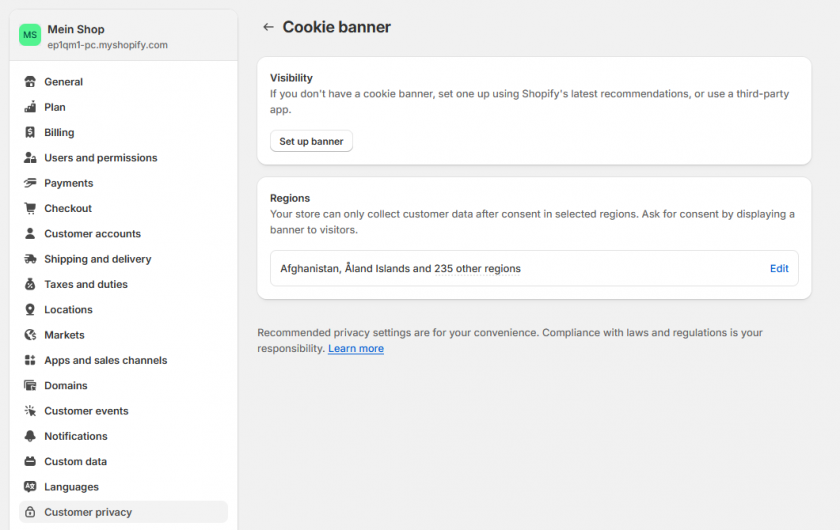
Note: In some versions of Shopify this setting is not present, instead you should see the following screens: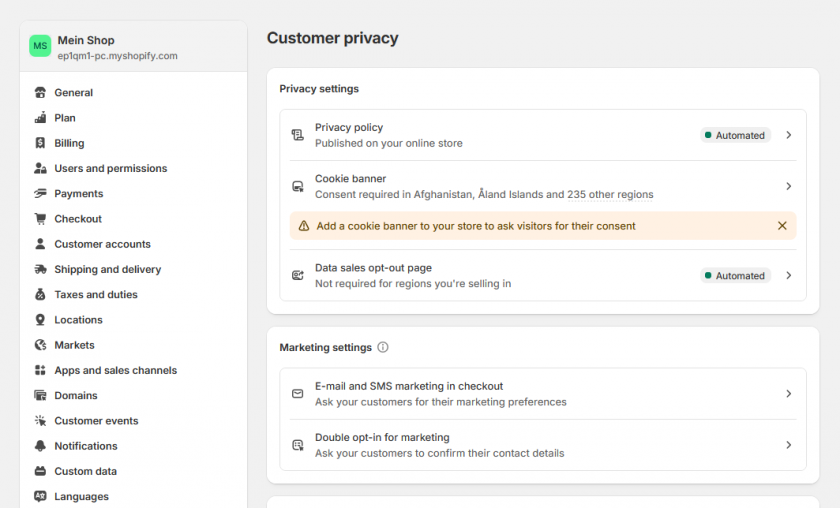
The warning that Shopify shows here, can be ignored since you manually inserted the Code into the Theme.
- When enabling the custom cookie banner (or if already enabled under Settings > Customer Privacy > Cookie Banner > Regions > Edit), ensure that all regions are selected and then click on Confirm.
Important: Please always ensure you have deactivated all other cookie banner plugins and consent mode plugins in your Shopify store under Settings > Apps and sales channels: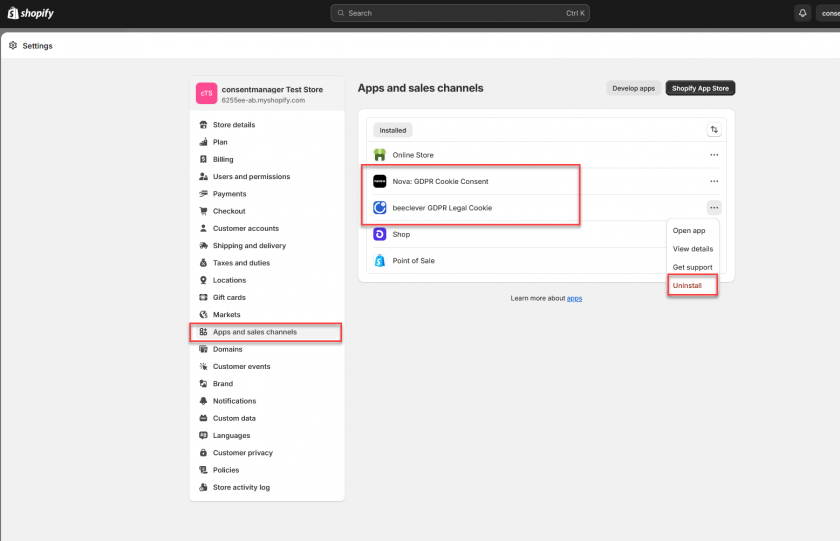
Typical problems
Problem: Shopify's own analytics does not count anymore / counts less
In some cases, the automatic blocking might also block Shopify's own internal tracking system. In order to prevent this, please login to your consentmanager account and go to Menu > CMPs > Other and disable the setting Block inline scripts: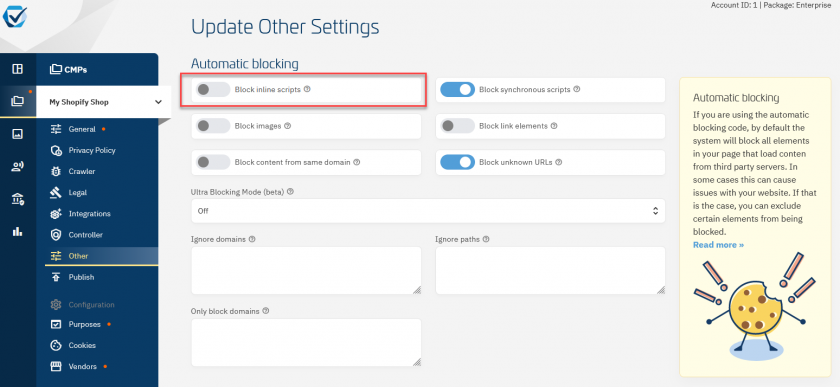
Problem: Google Consent Mode default is set to granted
Unfortunately Shopify's own tracking system is setting the Google Consent Mode consent status to granted by default. In order to prevent this, please add the following code in your Theme:
- In the menu click on your Online Store > Themes and edit the code of the current theme:
- Open the file theme.liquid, search for
<head> - Right after <head> insert the following code (after <head> and before any other code):
 <script>
  //Prevent Shopify from writing default consent mode before consentmanager loaded
  window.dataLayer = window.dataLayer || [];
  function gtag ()
  {
   if (!('cmploaded' in this))
   {this.cmploaded = false;}
   if (arguments.length > 1 && arguments[0] == 'consent' && arguments[1] == 'default' && !this.cmploaded)
   { return; }
   if (arguments.length > 1 && arguments[0] == 'set' && arguments[1] == 'developer_id.dMzk4MW')
   {this.cmploaded = true;}
   dataLayer.push(arguments);
  }
  window.dataLayer.push(['consent', 'default', {
   'ad_storage':         'denied',
   'analytics_storage':  'denied',
   'ad_user_data':       'denied',
   'ad_personalization': 'denied',
   'wait_for_update':    500
  }]);
 </script>
Problem: consentmanager Consent Layer is not visible
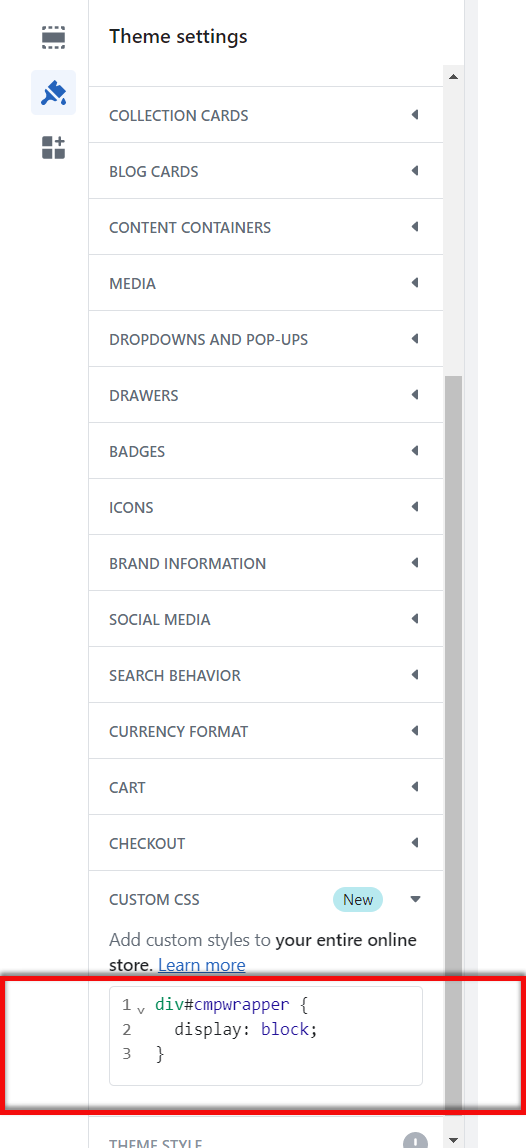
Some Shopify themes have added CSS style that hide empty DIV elements. If you have activated the WCAG option in your design (Menu > Designs > Edit design > Box settings) then the CMP is placed in a shadow root, therefore the parent DIV seems to be empty and is hidden by the Shopify CSS. In order to fix this, you need to add a custom rule to not hide empty DIVs:

- In your Shopify admin, go to Online Store > Themes
- Click Customize.
- Click Theme settings.
- Click Custom CSS.
- Add a new CSS rule and press Save:
div#cmpwrapper {display: block;}