


How to integrate the CMP into a WordPress website?
In order to integrate your CMP into a WordPress website, you can use our WordPress plugin or insert your CMP code manually, we recommend using the plugin:
Integration using our plugin
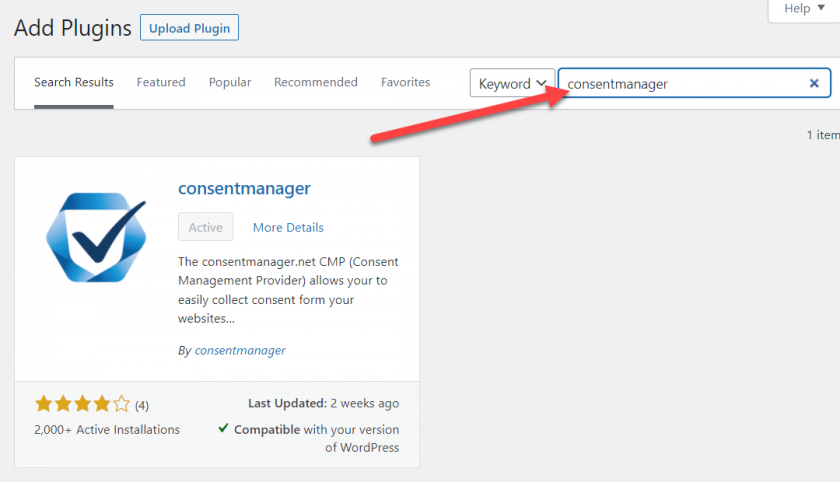
- Login to your WordPress CMS and click on Plugins section > Add New.
- On the next page search for "consentmanager" - Download Link on wordpress.org
- The Page will show you matching plugins. On the consentmanager plugin click on the "Install Now" button
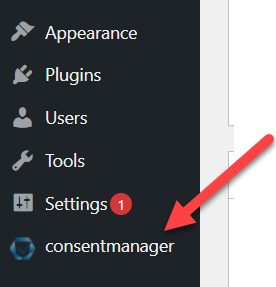
- Once the Plugin is installed & activated, you will find a new Item in your navigation.
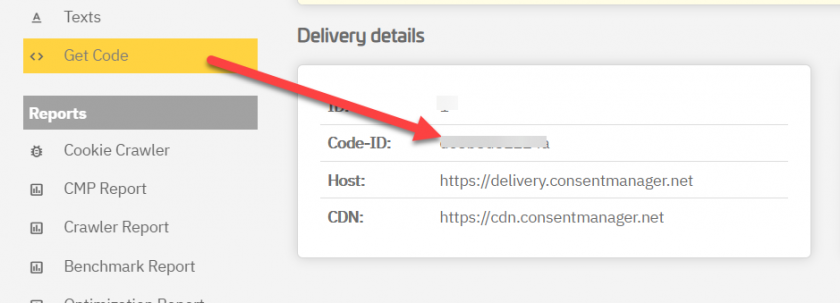
- Login to consentmanager.net and click on CMP => Get Code, scroll down to the section "Delivery Details", then copy the Code-ID of your CMP:
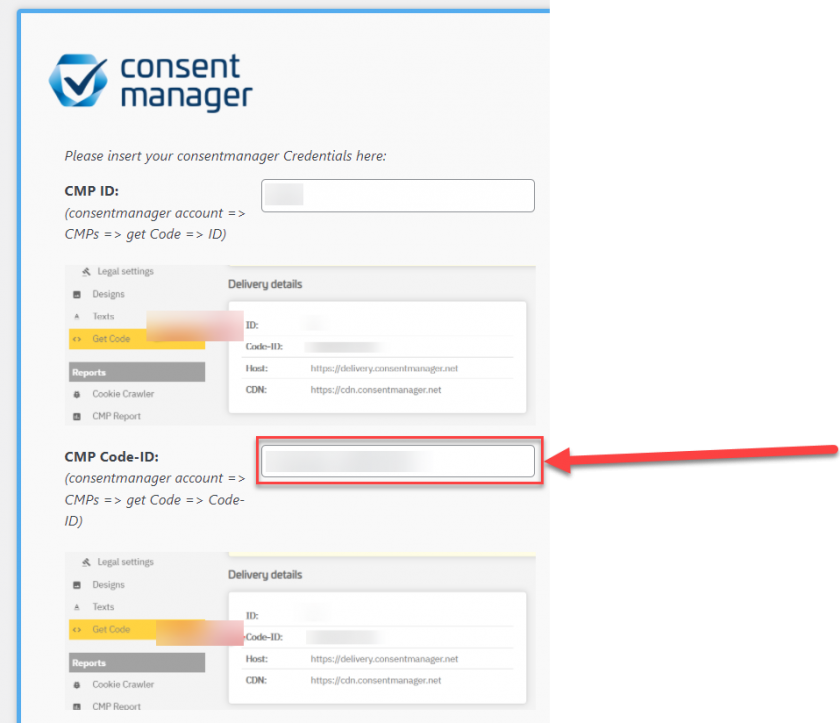
- Paste your Code-ID here (inserting your CMP-ID also works instead of your Code-ID but we recommend using the Code-ID, because the CMP-ID input field will be depreceated in the near future):
- Choose your blocking mode:
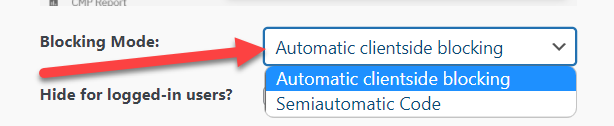
Automatic Clientside: Javascript based blocking of 3rd party scripts listed in your consentmanager account.
Semiautomatic Clientside: Blocks all scripts that you marked in your code.
-
Optional: When you activate "Hide for admins", the CMP will be deactivated for logged in Admins. This can be helpful if you are using a frontend editor like the Divi Builder.
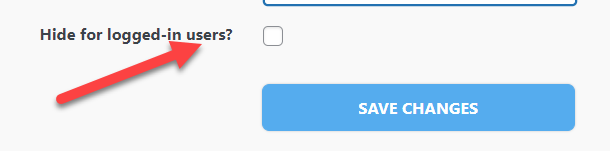
- Once you saved your settings, the Code will be automatically inserted into your page.
When using a caching plugin: In exceptional cases there can be some design conflicts with caching plugins. If you experience unusual design behaviour, please try to deactivate your caching plugin first and check whether the frontend result is good now. If you still experience any other problems, feel free to get in touch: support@consentmanager.net
Manual integration with HTML/JavaScript code
Please note: The below description is only valid for the manual blocking code. If you want to use automatic code blocking, please ensure that the CMP-Code is inserted directly after the <head> element of your website code.
- Login to your WordPress CMS
- Go to Appearance > Editor
- Edit the file that is responsible for the Header of your WordPress Theme (usually header.php)
- Find the start of the <body ...> section.
- Login to ConsentManager.net, go to Get Code and copy the Code from Section "Setup using Copy&Paste"
- Paste the CMP-Code directly after the end of the <body ...> section in your WordPress:
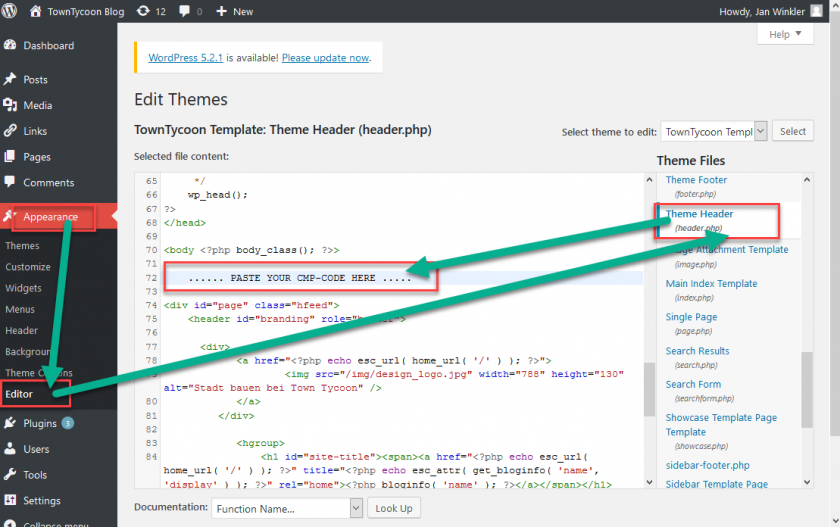
- Click on "Update File" button in order to save the changes.
Automatic Blocking of YouTube and other Elements (server-side)
You can find an example of how you can implement server-side blocking of YouTube videos here.
Does consentmanager support the WP consent API?
Yes we do! Please see our documentation here
