Working with SSO
Example: OAuth2 with Microsoft Azure
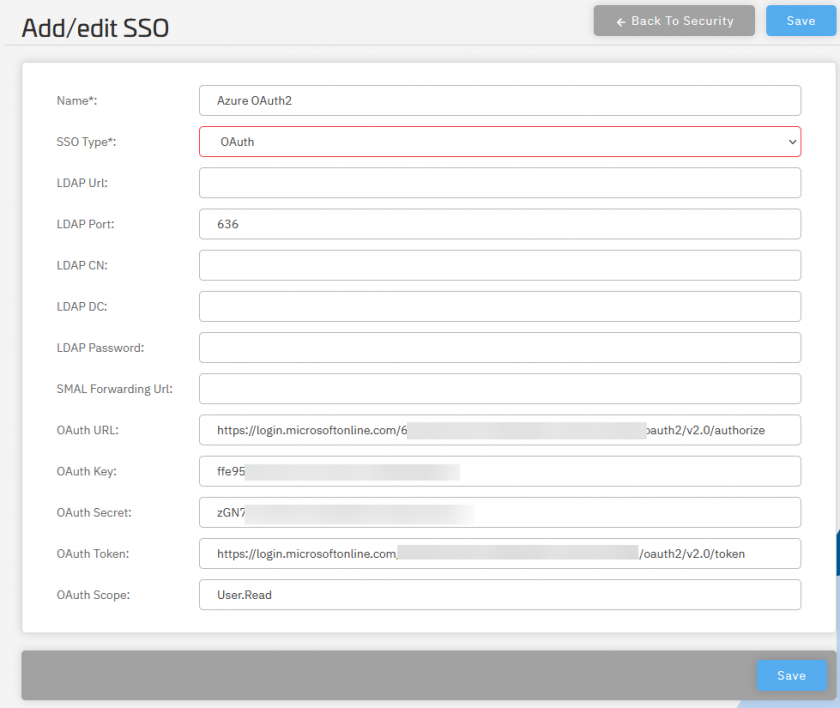
- Login to consentmanager and navigate to Account > Security > Add new SSO
- Login to your Azure Portal (portal.azure.com), click on Azure Active Directory > App registrations and add a new registration.
- Once the app is registered in Azure, click on the App > Endpoints and copy & paste the URLs into the consentmanager settings (Authorize URL and Token URL)
- From the app settings copy the Application (client) ID from Azure and paste it as OAuth key
- In the App click on client credentials and add a new client secret. Copy & paste the secret value (OAuth Secret) and secret id (OAuth Key) into consentmanager settings
- In consentmanager set the setting OAuth Scope to User.Read
- Save the new SSO
- In Azure go to Authentication > Add a plattform (Type: Web) and insert the URL https://app.consentmanager.net/login.php?sso=oauth as Redirect URI
- Navigate to consentmanager > Account > Users and assign the SSO to the corresponding users
Example: SAML SSO with Microsoft Azure
- Login to consentmanager and navigate to Account > Security > Add new SSO
- Login to your Azure Portal (portal.azure.com), click on Azure Active Directory > App registrations and add a new registration.
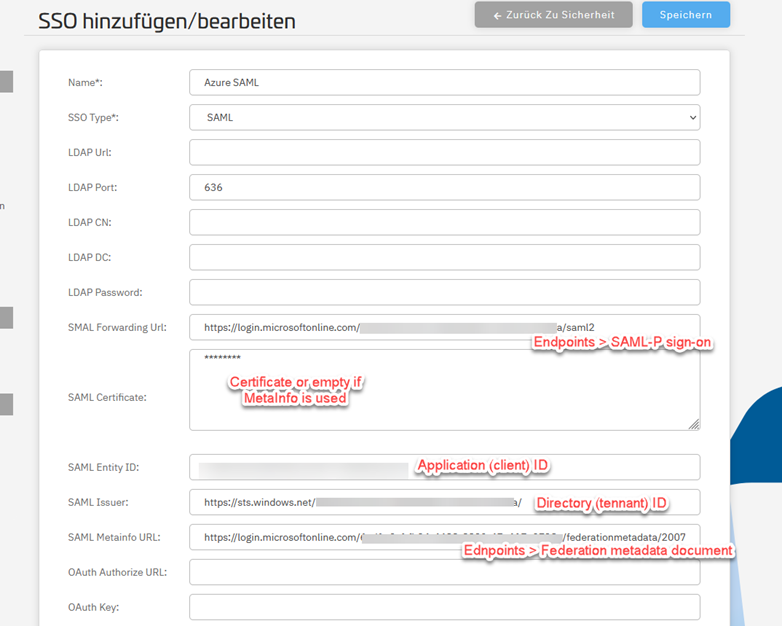
- Once the app is registered in Azure, click on the App > Endpoints and copy & paste the URLs into the consentmanager settings (Forwarding URL and Metainfo URL)
- From the app settings copy the Application (client) ID from Azure and paste it as Entity ID
- Save the new SSO
- In Azure go to Authentication > Add a plattform (Type: Web) and insert the URL https://app.consentmanager.net/login.php?sso=saml as Redirect URI
- Navigate to consentmanager > Account > Users and assign the SSO to the corresponding users
Example: SAML SSO with Microsoft Entra
- Login to Microsoft Entra (https://entra.microsoft.com)
- Go to Applications > Enterprise applications > New application > Create your own application
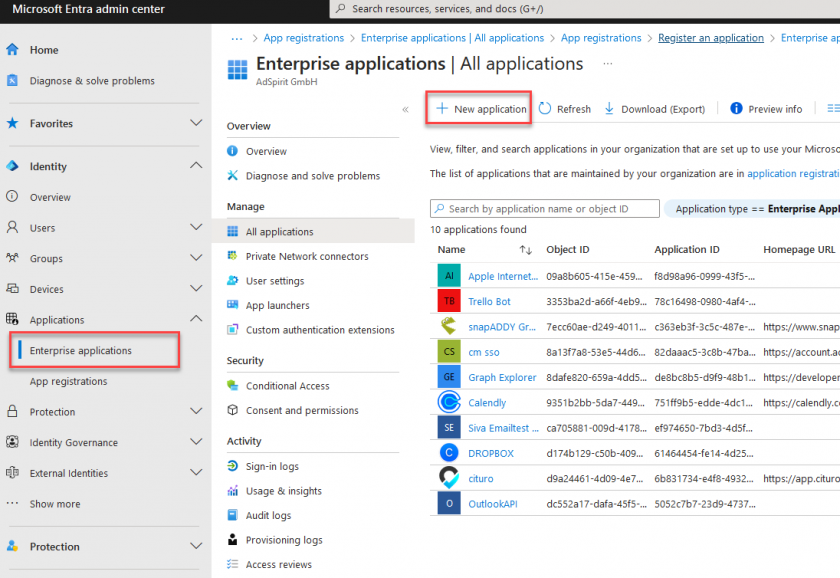

- Give the app a name, choose Non-gallery integration and click on Create
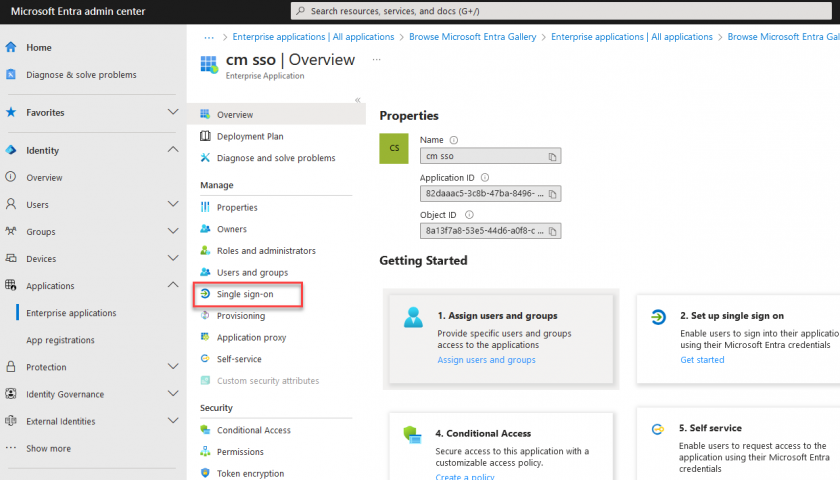
- Edit the app, go to Single sign-on and enable Single Sign-on via SAML
- Open a separate browser window and login to your consentmanager account and navigate to Menu > Account > Security and click on Add SSO
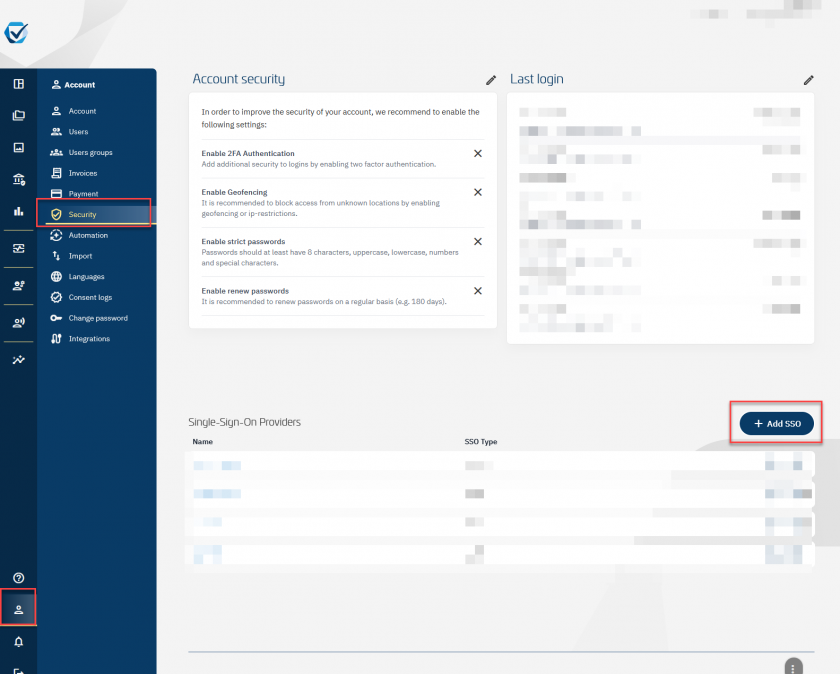
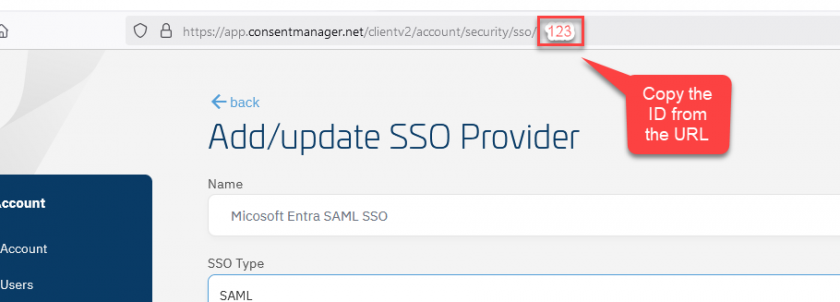
- Give the new SSO in consentmanager a name and save it. Click on Menu > Account > Security and edit the SSO you just created. Copy the SSO-ID from the URL
- Go back to Microsoft Entra and edit the settings under Basic SAML Configuration:
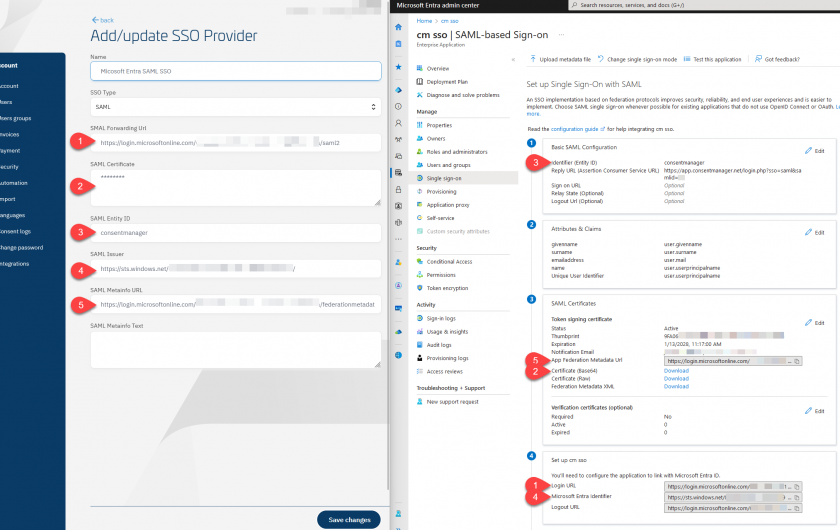
- Identifier (Entity ID): Give it a unique name, e.g. "consentmanager". Use the same name in the consentmanager settings (see below)
- Reply URL (Assertion Consumer Service URL): https://app.consentmanager.net/login.php?sso=saml&samlid=XX where XX is the ID of the SSO in consentmanager (see step above)
- Go back to consentmanager and edit the SSO settings:
- SSO Type: SAML
- SAML Forwarding URL: From Microsoft Entra > Enterprise Applications > Your application > Single Sign-on > Login URL
- SAML Certificate: From Microsoft Entra > Enterprise Applications > Your application > Single Sign-on > Download the Certificate (Base64) file and open the file in a Text Editor (e.g. Note), Copy & Paste the Certificate text to consentmanager.
- SAML Entity ID: Give it a unique name, e.g. "consentmanager". Use the same Name/ID also in Microsoft Entra > Enterprise Applications > Your application > Single Sign-on > Identifier (Entity ID)
- SAML Issuer: From Microsoft Entra > Enterprise Applications > Your application > Single Sign-on > Microsoft Entra Identifier
- SAML Metainfo URL: From Microsoft Entra > Enterprise Applications > Your application > Single Sign-on > App Federation Metadata Url
-
SAML Metainfo Text: Leave it empty
- In Microsoft Entra, go to Users and groups and add users and/or groups to the application.
- In consentmanager, go to Account > Users and create users. Ensure to use the same Username as used in Microsoft Entra


