


How to integrate the CMP into a Typo3 website?
Our plugin is tested for TYPO3 9.5 LTS, 10.4 LTS and 11.5.99 until now (08-07-2022).
In order to implement the CMP-Code into a website that is build with Typo3 CMS we recommend using the ConsentManager Typo3 extension which can be found here:
https://extensions.typo3.org/extension/consentmanager_v2
- Login to the TYPO3 Backend (Eg: https://www.domain.com/typo3/). The domain name needs to be replaced with the actual one.
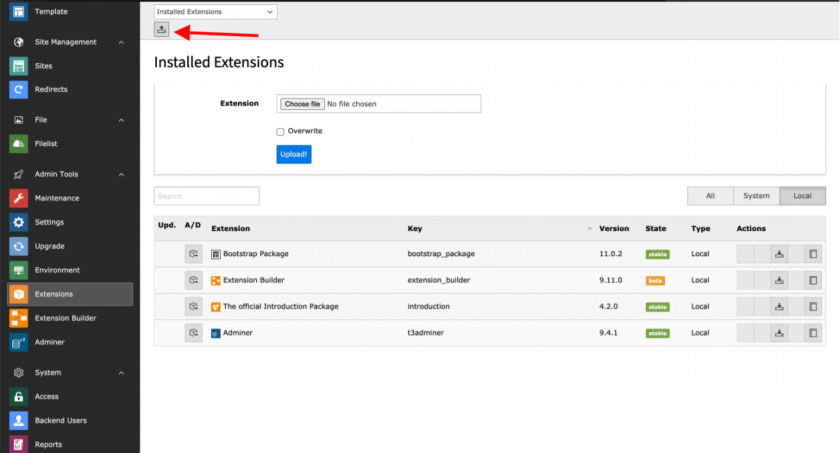
- Go to the “Admin Tools > Extensions” module in the left side panel.

- Click on the “Extension Upload” icon in the extension manager.
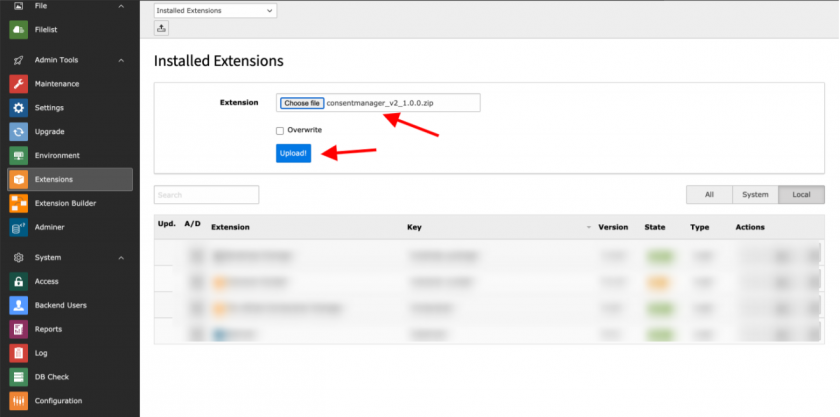
- Browse the extension zip file and click on the “Upload” button. If the extension is already installed, check the “Overwrite” flag.
After that make sure the extension is installed on the system.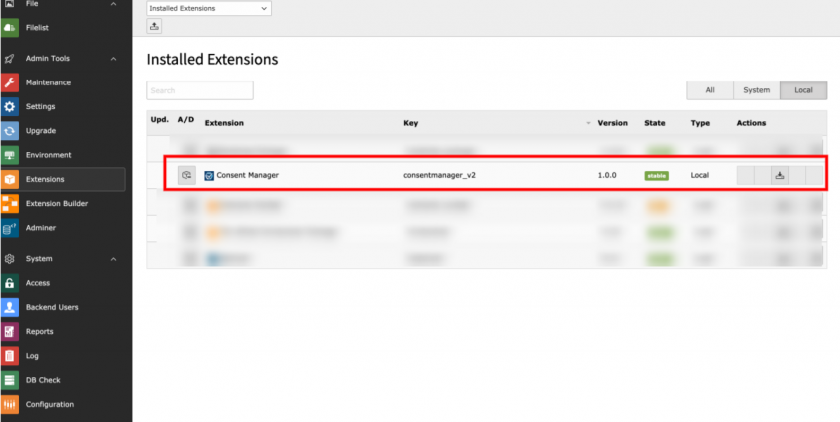
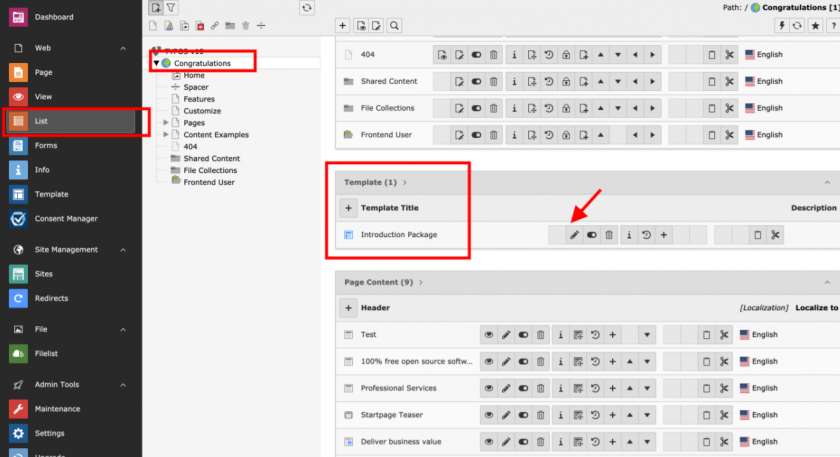
- After the extension has been installed, goto the “Web > List” module and click on the root page to include the extension in the TS template.
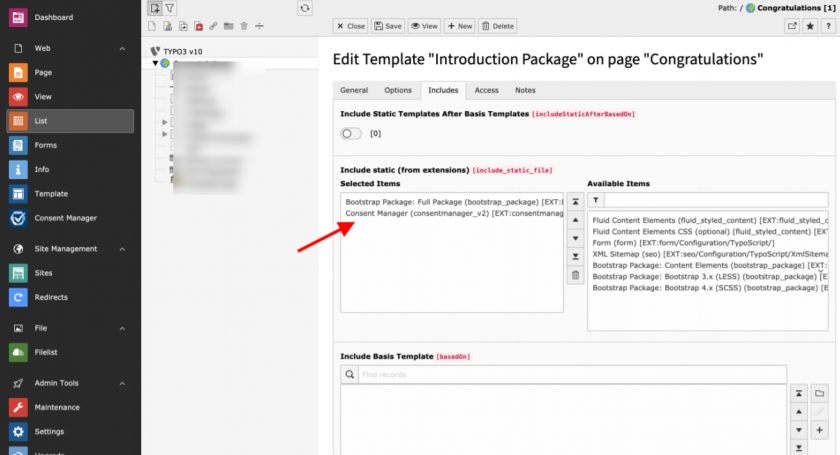
Once the TS Template edited, goto “Includes” tab and add the extension to "Include static (from extensions)". Once included click on “Save”.
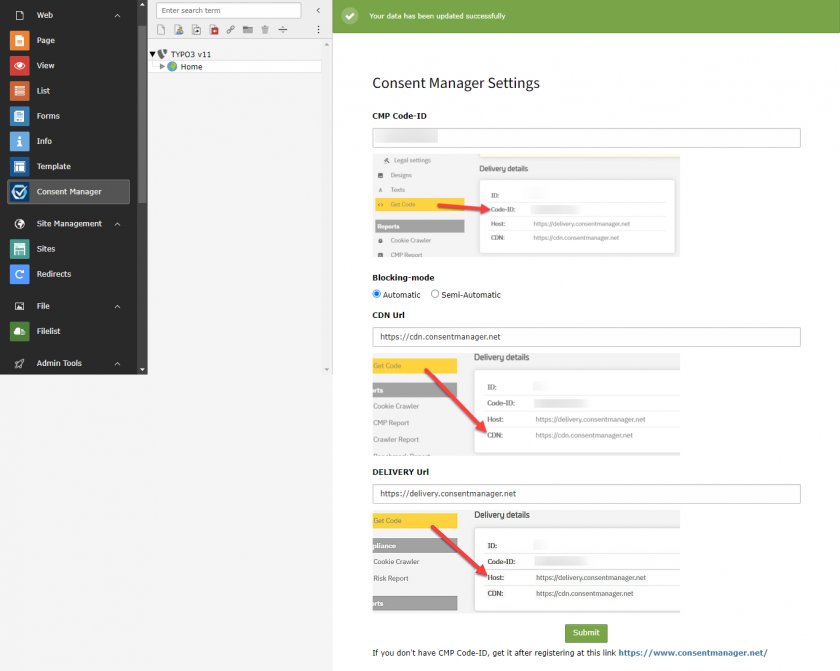
- Once the extension is included in the TS Template, goto the backend module “Consent Manager” to configure the Cookie Code.
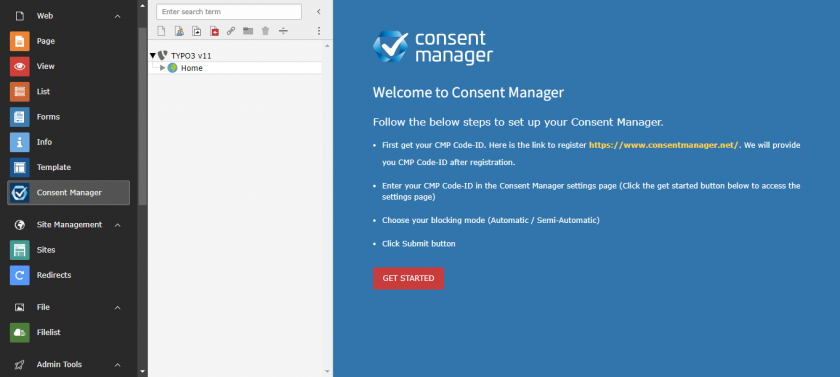
- In the “Consent Manager” module, first you can see some instructions regarding the CMP Code-ID generation which is mandatory to display cookie banner. To configure the Cookie settings, click on the “GET STARTED” button below the instructions. Then you will be redirected to the “Settings” page.
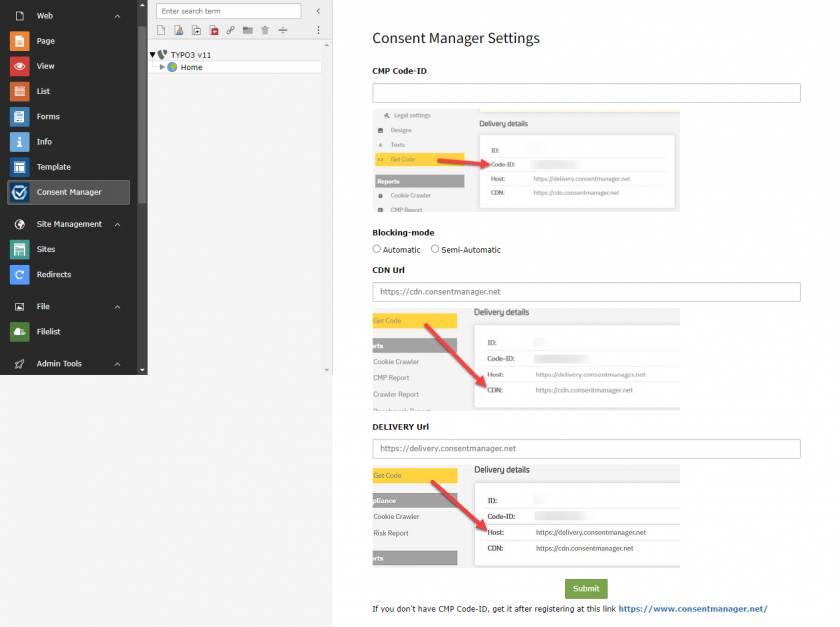
- Enter the CMP Code-ID, choose the blocking mode (Automatic/Semi-Automatic) and enter your CDN (optional) & Host (optional) from your CMP settings and click on the “Submit” button.
- You’re done. Just go to the frontend of the website (Eg: https://www.domain.com/) where the domain name should be replaced with the actual one.
- That’s it. You’re ready with the plugin.
