


Implementation via Google Integrated CMP Partner
consentmanager is among a few of CMPs that have been chosen by Google to be an integrated CMP partner. This means, clients can now create a new consentmanager account directly from their Google interface.
Automatic account configuration
When using the automatic account setup as described above, the system will automatically prepare certain steps for you and configure certain options. These include:
- Account setup
- Your E-Mail address will be used as username, name and email for the new account
- Your website URL will be used as the default website for the new account
- The language you choose will be set as default language of the new account
- CMP setup
- A CMP will be created with the name of your website
- The design "Google" will be set as default for the new CMP
- The "classic purposes" (Function, Marketing, Measurement, Social Media, Other) will be added to the CMP
- The vendor "Google Ads" (ID s1) will be added to your vendor list and assigned to purpose Marketing
- An automatic crawl will be started for your website and found vendors & cookies will automatically be added to your vendor list and cookie list
- Your website domain will be added to the whitelist
How to create your consentmanager account
In your Google account, e.g. in your Google Ads or Google Analytics interface, you will receive a notification if no consent signals are received from the Google tags on your website. This notification can usually be found on the dashboard.
- Click on the notification on your dashboard. OR If you do not have a notification, go to https://tagmanager.google.com/#/home, switch to Google-Tags on top and click on the tag you want to edit. In the tag configuration switch to Admin and click on Set up consent mode

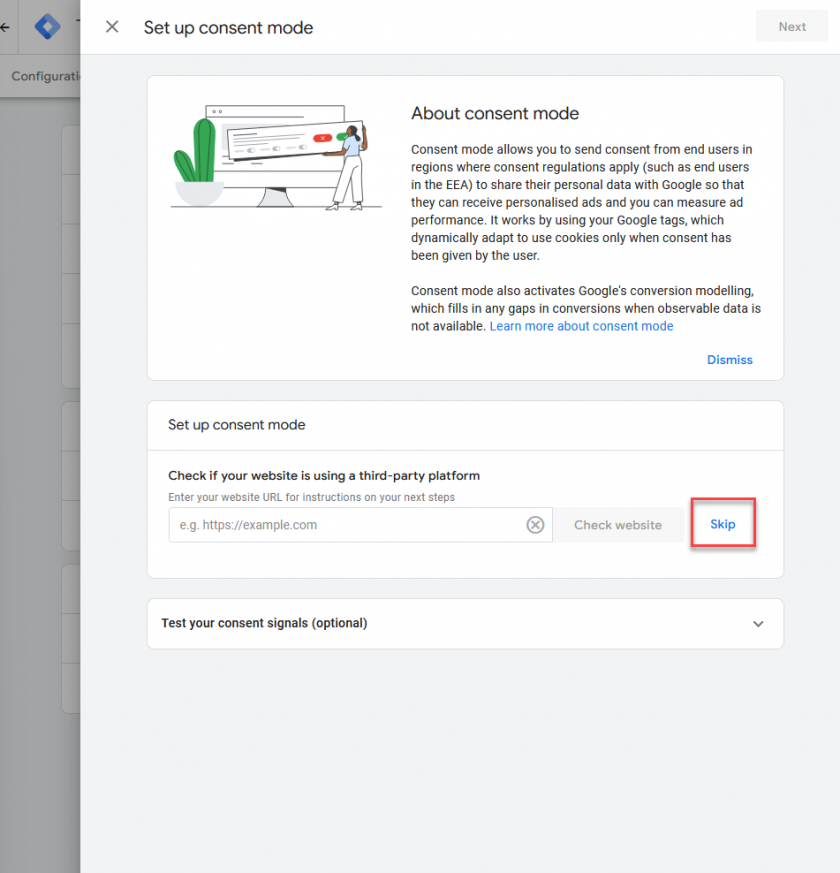
- Click on Skip in the first screen:
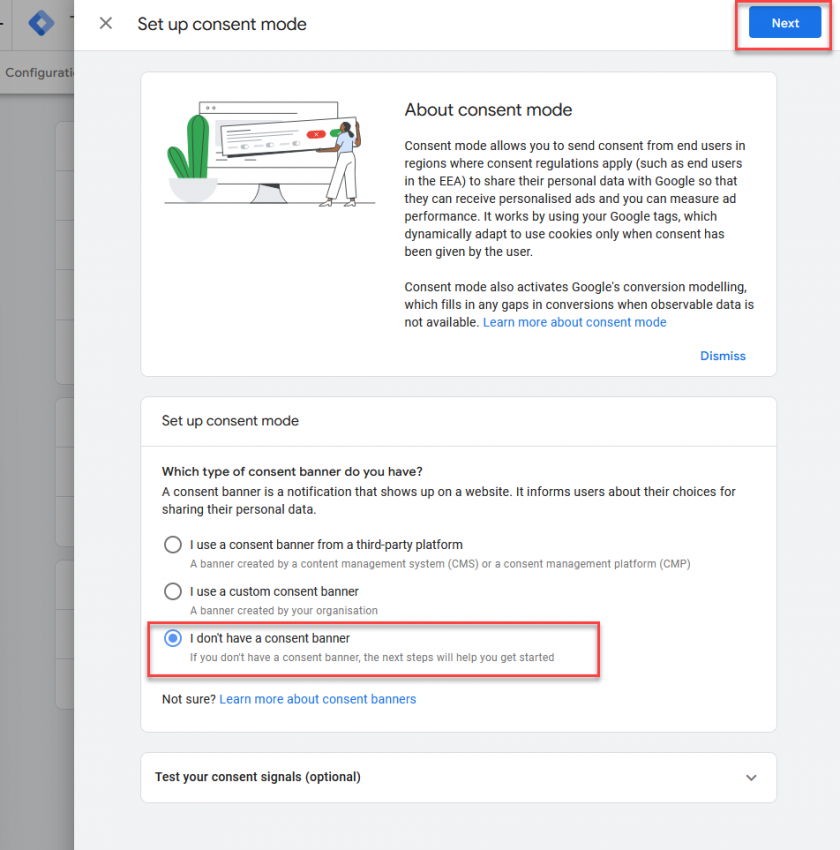
- Choose the option "I don't have a consent banner" and click Next:
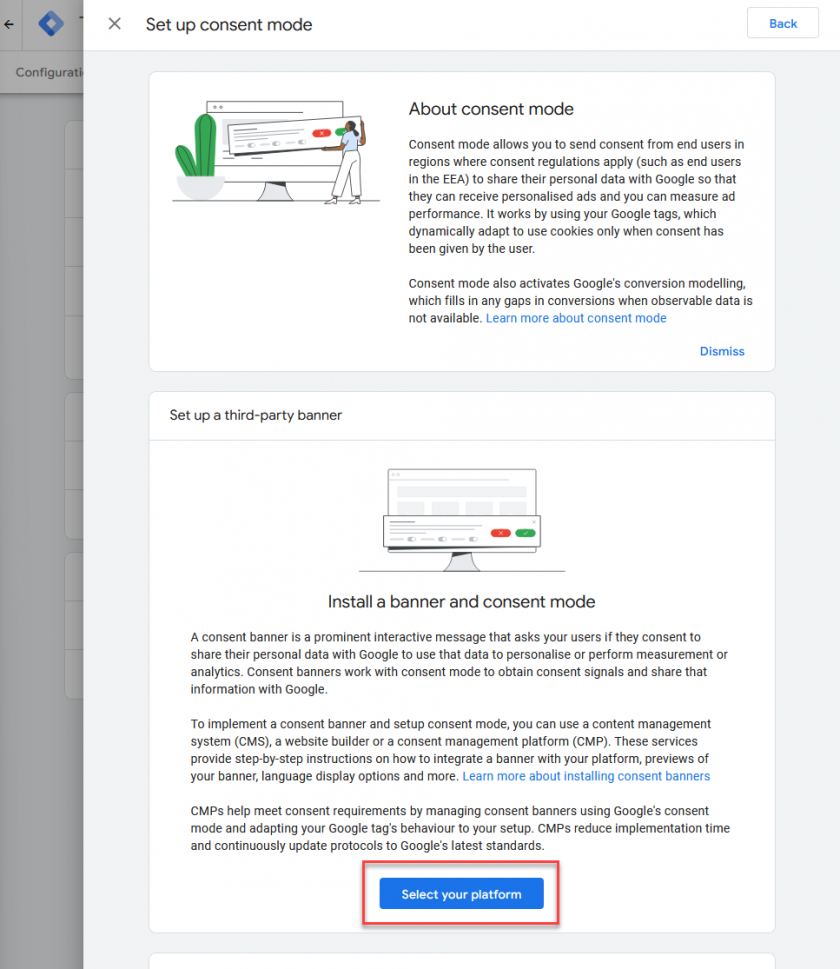
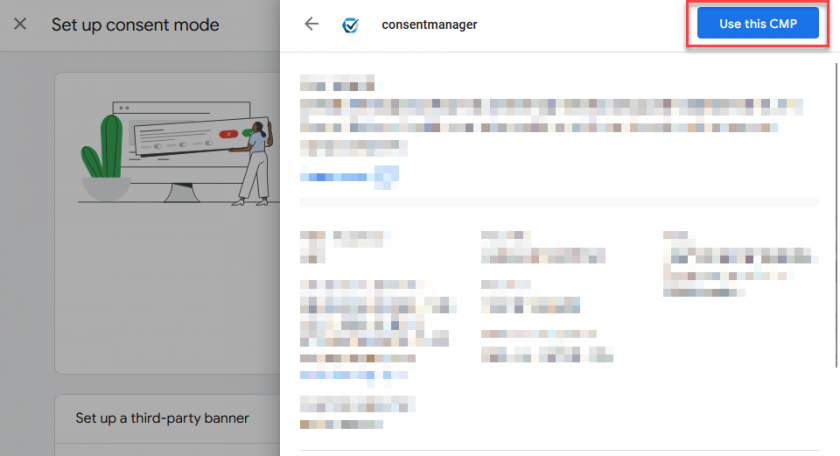
- Click Select your platform:
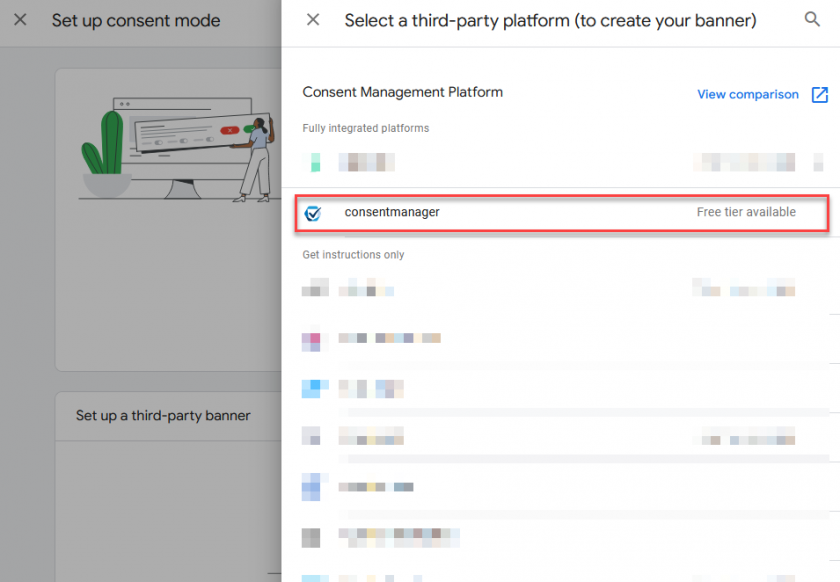
- Click on consentmanager in the list of CMPs and then click on Use this CMP:
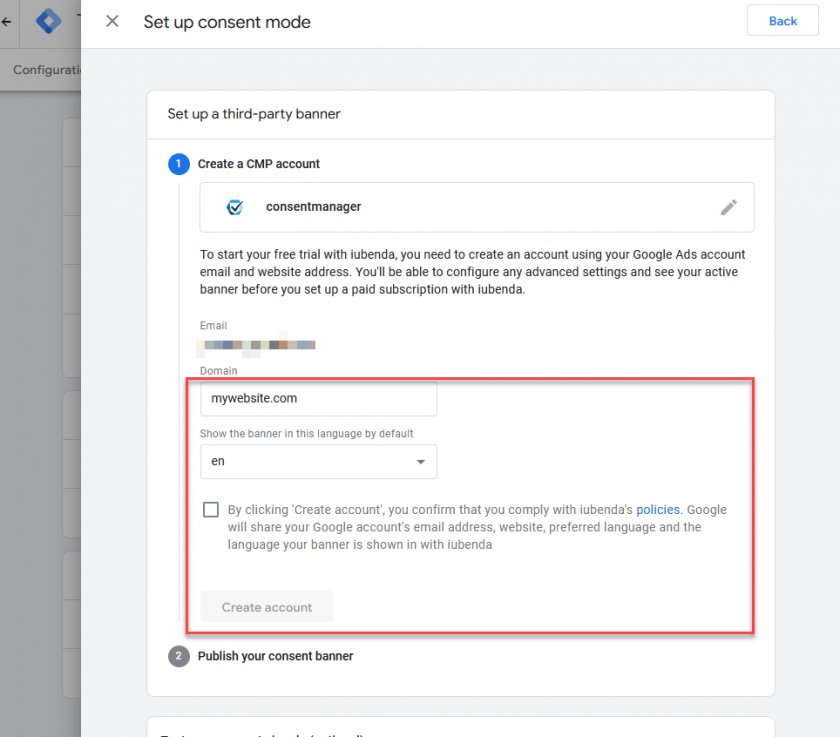
- Insert your domain name and choose the default language for your cookie banner and click on Create account:
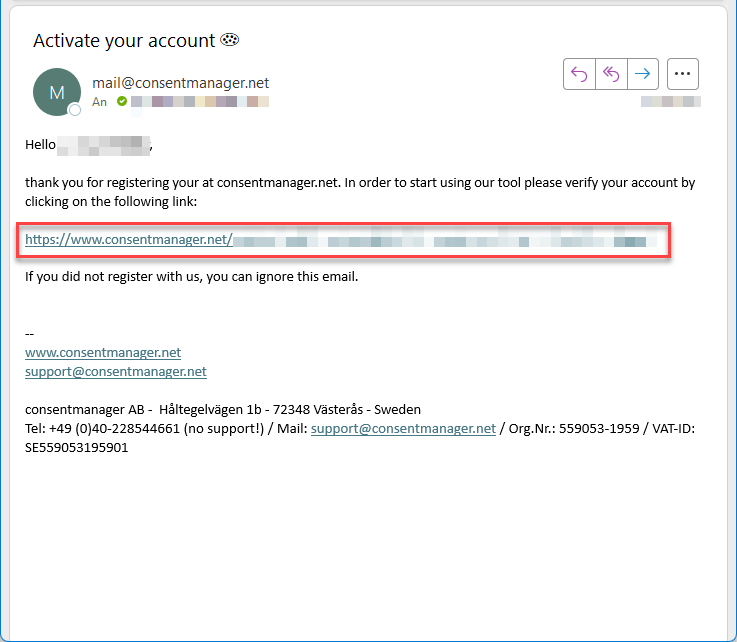
- Once you clicked on Create account, our system will send you an confirmation email with a link in it. Please ensure to click the link in order to activate the account.
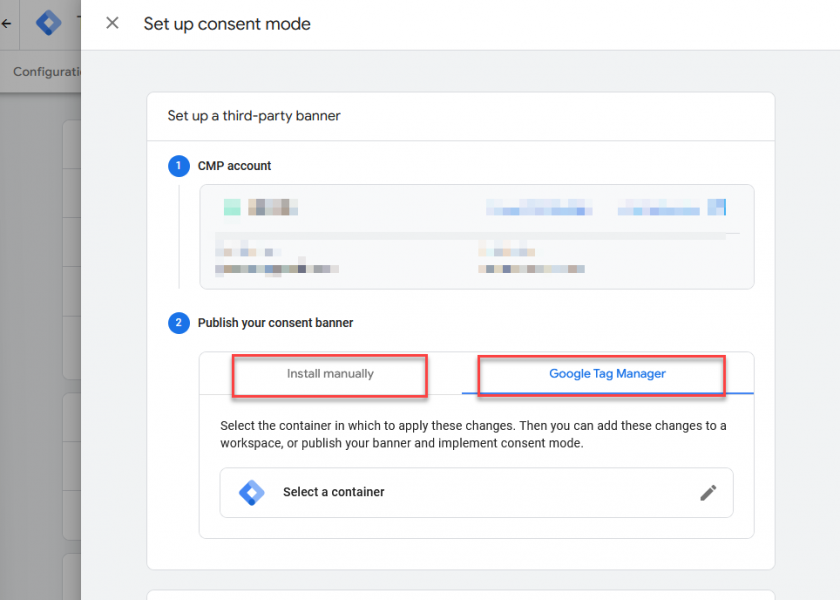
- Your account will automatically be created (see below) and you will see the codes for the consent banner and the option directly integrate via Google Tag Manager. Depending on your prefered way, either copy the displayed code into your website or select the GTM container in which the consentmanager code shall be inserted.
- Depending on your setup, please read here for next steps:
Next steps
As next steps we recommend logging into your account to explore the many configuration and customization possibilities:
For example you can ...
- ... create a custom design or adjust the existing design.
- ... check your vendor list and assign found vendors to the corresponding purposes.
- ... check the reports of the cookie crawler and verify the results.
In addition, we recommend configuring the blocking of all third party codes and cookies in your website and update your privacy policy:
More Info
For more information see here:
-
Strengthen Your First-Party Data Strategy with New Tools - https://support.google.com/google-ads/answer/15306140?sjid=3993403504994918092-EU
-
Use an integrated CMP partner to set up your consent banner and consent mode - https://support.google.com/tagmanager/answer/15239830?sjid=196171537470019233-EU
